
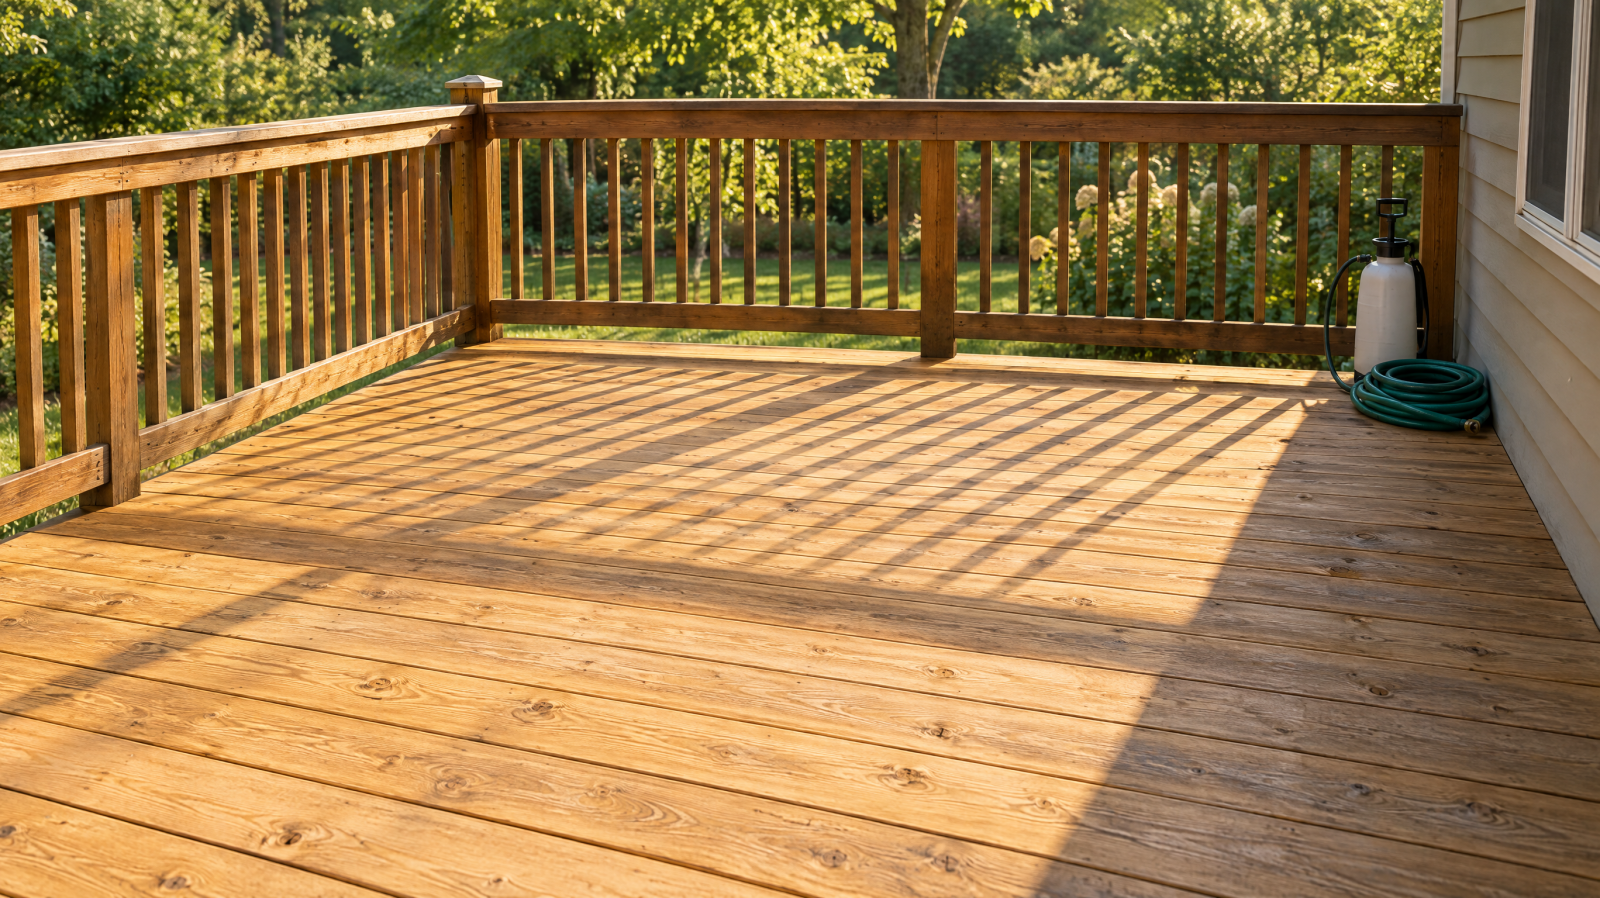
If your deck has turned gray, feels splintery, or the old finish is flaking off in patches, this guide walks through restoring a wood deck yourself, start to finish, in a way that holds up.
You’ve probably seen the claim that you can restore a deck in a single day. Part of that is true and part of it isn’t. This guide is for the weekend DIYer who wants a realistic plan, not a rushed job that looks good for a month and fails by the end of summer.
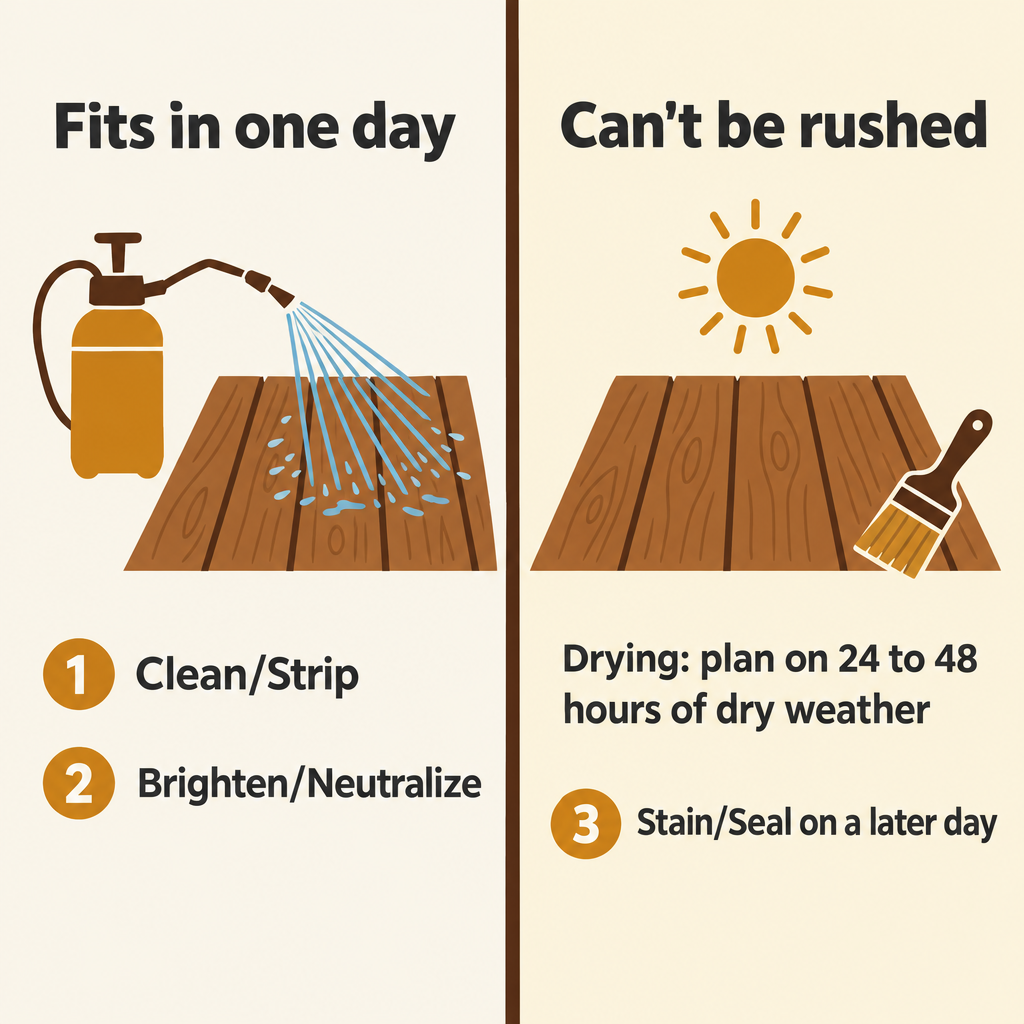
Here is the realistic timeline. You can clean, strip, and brighten a typical residential deck in a single day of focused work. But the wood needs to dry before it gets stained, and that drying window is what separates a finish that lasts for years from one that fails in months.
At Woodrich Brand, we’ve been restoring decks professionally since the early 1990s. Our founder Russell Cissell developed the three-step system (clean, brighten, stain) on real job sites, where the finish had to hold up season after season. A full deck restoration is a weekend project: Day 1 for prep, Day 2 for staining once the wood has dried.
This guide covers the whole process in order, from assessing the wood to the final application of stain. You’ll know each step, the supplies to have ready, and how to plan the weather window.
The active labor for a 300 to 500 square foot deck (cleaning, brightening, and rinsing) fits into one working day. The part that can’t be compressed is drying.
Wood is hygroscopic, meaning it continuously absorbs and releases moisture based on temperature, humidity, and air circulation. A deck that was just soaked with a pressure washer needs time to release that moisture before you stain. A penetrating oil stain works best going into open, receptive wood fiber, so drier wood pulls it in faster and deeper.
For film-forming finishes (the kind you’d find at a big-box store), the problem is worse. Moisture trapped beneath the film pushes outward as it dries, which contributes to blistering and peeling. That’s likely what drove you to restore the deck in the first place.
Plan for at least 24 to 48 hours of dry weather after cleaning before you stain. That’s our recommendation for favorable conditions: warm, dry, with good air circulation. In humid, shaded, or cooler environments, drying takes longer.
A realistic weekend schedule:
If the wood still feels damp on Sunday, wait for the next dry day. Waiting an extra day costs you nothing, and drier wood will drink up the stain faster and let it soak in deeper.
Most species of wood will be dry enough after one day to finish with Woodrich products. That said, if you can afford the time, wait for the wood to be nice and dry. It will absorb the stain faster and soak in deeper than if you stain it while it’s still damp.
Before you buy a single product, you need to know what condition the wood is in. Every deck falls into one of three categories, and each one needs a different prep approach.
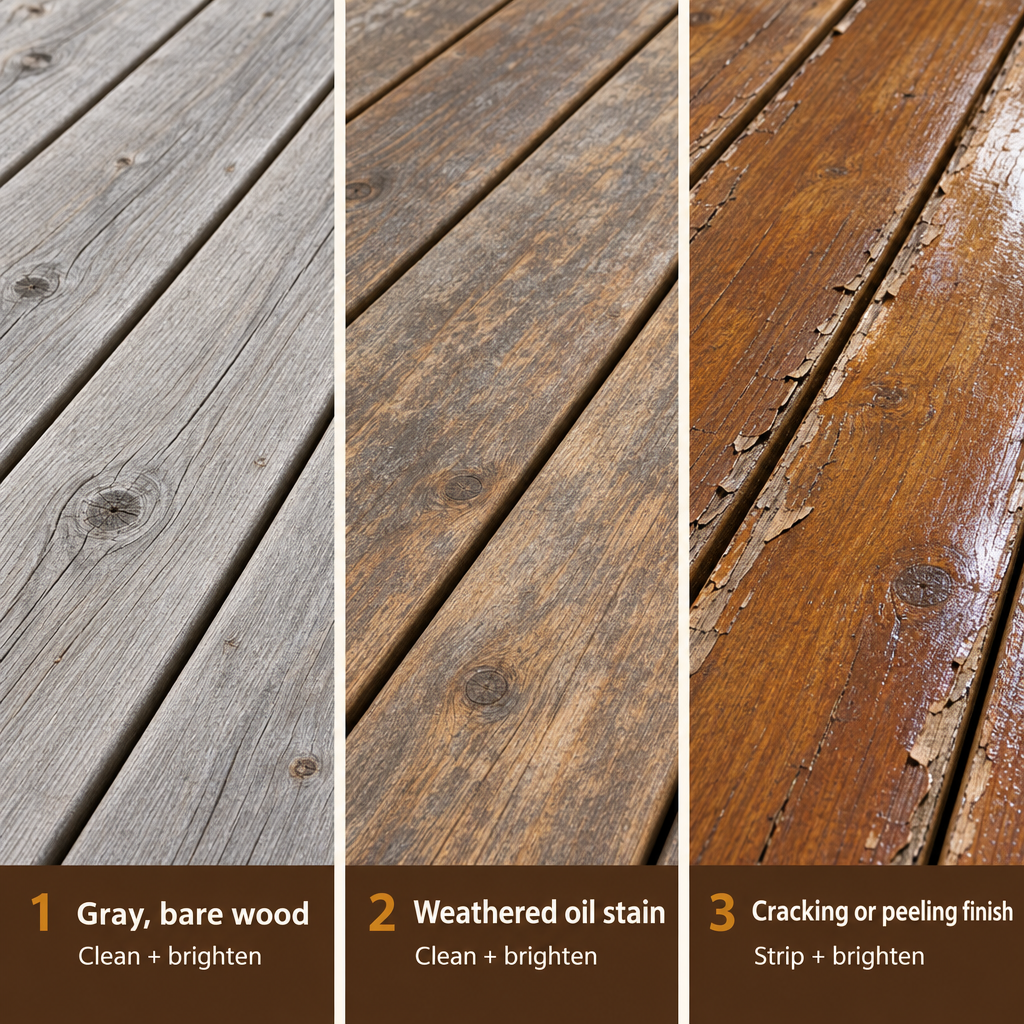
The wood has no existing finish, or the previous finish has completely worn away. The surface looks gray, dull, and unprotected. This is the simplest scenario.
What you need: A peroxide-based cleaner (EFC-38) plus a citric acid brightener (Citralic).
The finish looks chalky and dull and is wearing away evenly. Bare wood may be showing in high-traffic or sun-exposed areas. No cracking, peeling, or shiny patches.
What you need: Same as Condition 1. EFC-38 plus Citralic.
The finish is cracking, peeling, or lifting at board edges. Some areas still look intact (possibly shiny) while others have failed. This is a film-forming product at the end of its life.
What you need: A heavy-duty stripping product (HD-80) plus Citralic. This is a bigger job. HD-80 requires full personal protective equipment: gloves, rain suit, and eye protection.
A note on hybrid formulas: Some products sold as “oil stains” behave like film-forming finishes when it comes time to remove them, so the label doesn’t always match how the product comes off. The visual test is simple. If the existing finish is chalky, dull, and wearing away evenly, treat it as an oil-based finish. If it’s flaking, peeling, or still shiny in spots, treat it as a film-forming finish regardless of what the original label said.
Not sure which category your deck falls into? Text a photo to the Woodrich Project Support Hotline at (636) 288-8512 and we’ll tell you what you’re looking at and what products you need.
Finally, check the structural condition of your deck before you start. Probe posts, joists, and beams for softness or rot. Check the deck-to-house ledger connection, railings, stairs, and fasteners. A weathered but structurally sound deck can be restored. A structurally compromised deck needs repair or professional evaluation before cosmetic work makes sense. The North American Deck and Railing Association has homeowner inspection resources worth reviewing.
Deck restoration depends on the weather, so you need to think beyond whether it’s going to rain today.
Your weather checklist:
The common mistake is only checking the forecast for stain day. What matters just as much is the dry stretch after you clean and the dry window after you stain. A sunny stain day doesn’t help much if rain moves in that night before the stain has cured. For more on seasonal timing, see our guide on the best time of year to stain your deck or fence.
Get everything together before you start. Running to the hardware store in the middle of the job wastes time you planned to spend on the deck.
For all decks:
For Condition 1 or 2 decks, add:
For Condition 3 decks, add:
A quick word on plants: pre-wet the landscaping around the deck with your garden hose before you start, and rinse it again when you’re done. Skip the plastic. Covering plants with sheeting on a warm day can steam-cook them, especially clear plastic. A good soak before and after is safer.
Our Wood Restoration Kits bundle the right combination of products for your project size and save roughly 10% compared to buying each product individually. They also take the guesswork out of which products to pair together.
Prep is the step that determines your final result, so take your time here.
Your technique matters more than the machine’s PSI rating. After a proper pretreat, the loosened material just needs to be rinsed away. Flow rate (GPM) does that work, not pressure.
We recommend a minimum of 3 GPM. Many consumer electric pressure washers put out only 1 to 2.5 GPM, which means prep takes significantly longer even if the advertised PSI looks impressive. If your machine is under 3 GPM, renting a gas-powered washer for the day is worth the $50 to $75.
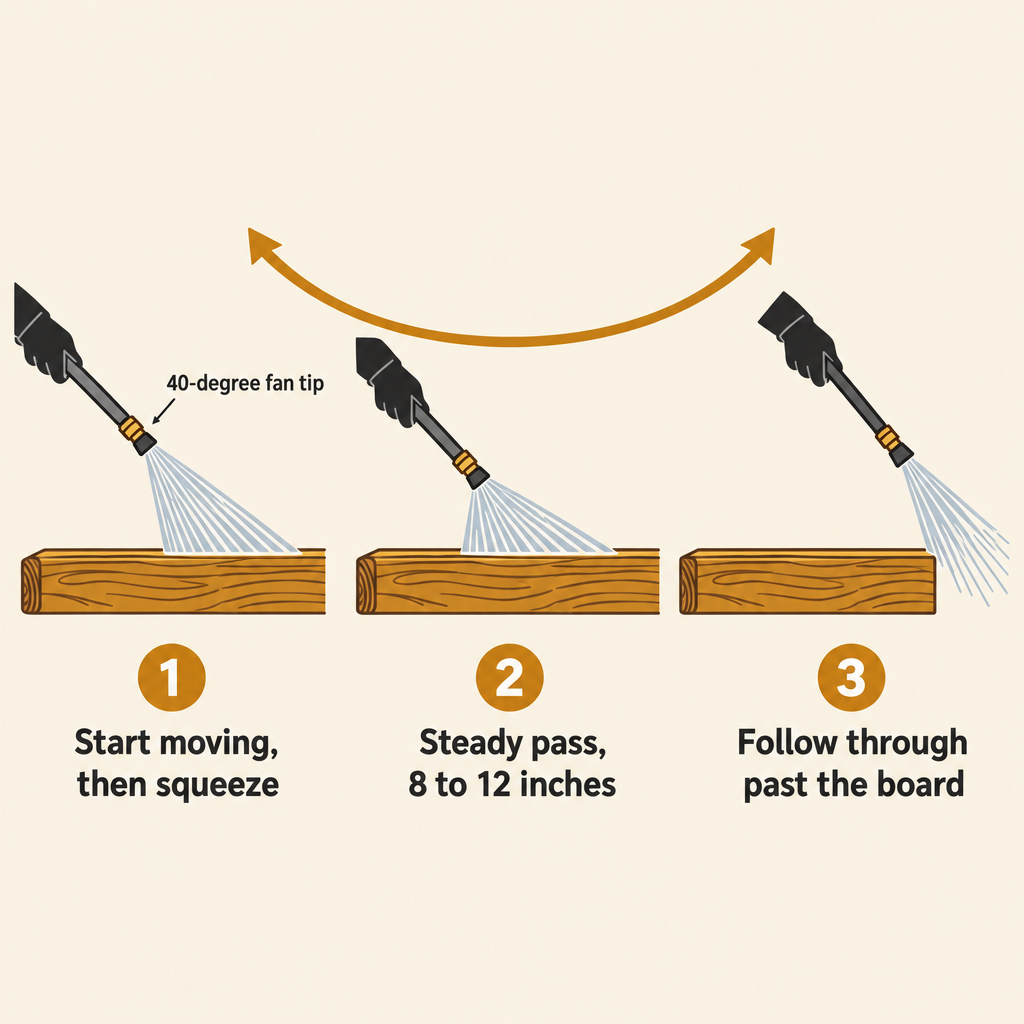
Use a 40-degree fan tip and keep the nozzle 8 to 12 inches from the surface. Experienced hands often reach for the narrower yellow 15-degree tip, but the wider 40-degree tip is more forgiving if this is your first time. Think of each pass like a golf swing. Fan the wand into and out of every stroke so you’re never starting or stopping with it pointed straight down at the wood. Start moving before you squeeze the trigger, hold a steady distance as you pass in front of you, and follow through until the spray clears the end of the board before you let off. Always work with the grain. Never hold the spray in one spot or scrub back and forth like an eraser, which concentrates the force and leaves permanent marks.
After cleaning or stripping, the wood’s pH has been raised by the alkaline chemistry. Citralic (a citric acid-based brightener) neutralizes that alkaline condition and brightens the wood back to a fresh-cut appearance without bleaching or damaging the surface. It also conditions the surface for better stain penetration.
Skipping this step is a common shortcut, but stain applied over alkaline wood won’t bond and cure properly.
Mix Citralic with water, apply with a pump sprayer, allow at least 5 minutes of dwell time, and rinse thoroughly. The whole process takes less than an hour for most decks.
At this point, your prep day is done. Let the wood dry.
This is the step most “one day” restoration guides get wrong. There is no way to speed up drying.
You don’t need a moisture meter to figure this out. Timber Oil is formulated so it isn’t as moisture-sensitive as other oil-based stains, so a little residual dampness won’t foul the finish. In favorable conditions (warm, dry, breezy), most decks are dry enough to stain after a day. The wood lightens back toward its normal color and stops feeling cool and damp to the touch.
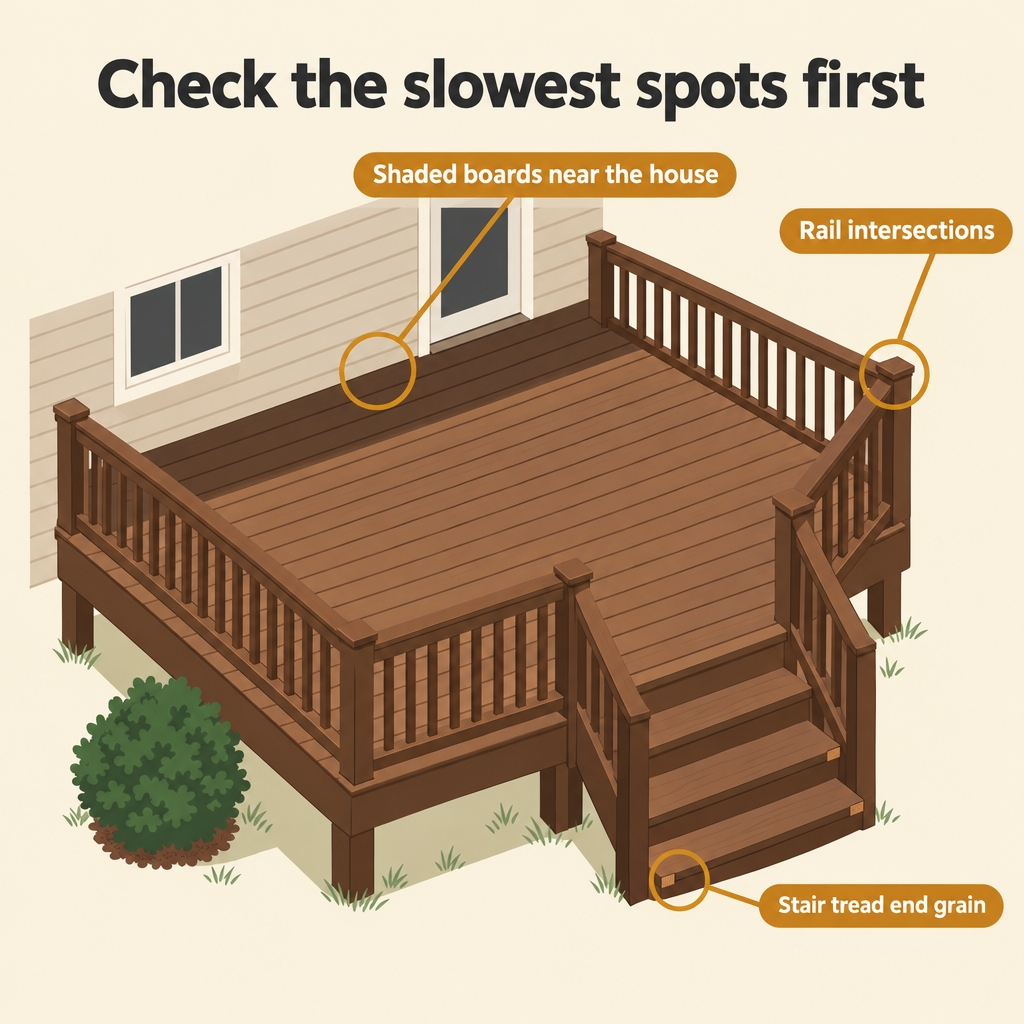
When you check, look at the areas that dry slowest: shaded boards near the house, rail intersections, and the end grain of stair treads. Go by those, not by the board sitting in full sun. And if you can spare an extra day, take it. Drier wood pulls the stain in faster and deeper.
What affects drying speed:
| Factor | Faster Drying | Slower Drying |
| Temperature | Warm (70°F+) | Cool (below 60°F) |
| Humidity | Low (below 50% RH) | High (above 70% RH) |
| Air circulation | Breezy, open exposure | Still air, enclosed |
| Sun exposure | Direct sunlight | Full shade |
Twenty-four hours in hot, breezy, dry weather is not the same as 24 hours in shade at 85% humidity. In favorable conditions, a weekend schedule (Saturday prep, Sunday stain) works well. In cooler, humid, or shaded conditions, you may need an extra day or two. That is fine. Waiting a day costs nothing, and it is far less work than having to give it another application because the wood didn’t have a chance to soak up as much protection as it should.
For a closer look at what to expect, see our guide to deck stain drying times with oil-based products.
What about the water splash test? Splashing water on the deck and watching whether it absorbs or beads up tells you whether the wood will accept stain, but it doesn’t tell you how far the wood has dried underneath. It’s useful for one thing in particular: checking whether an old water-repellent finish is still blocking penetration.
Once the wood has dried, you can stain. Timber Oil Deep Penetrating Wood Stain is a 100% oil-based, deep-penetrating stain formulated for softwoods like cedar, pressure-treated pine, cypress, and redwood. It penetrates the wood rather than forming a surface film, which is why it’s guaranteed not to crack or peel.

For a detailed walkthrough, see our step-by-step guide to staining your deck for the first time.
Timber Oil covers 150 square feet per gallon. Quick reference:
| Deck Floor Area | Timber Oil Needed | Minimum Purchase |
| 200 sq ft | 1.3 gallons | 2 gallons |
| 300 sq ft | 2.0 gallons | 2 gallons |
| 400 sq ft | 2.7 gallons | 3 gallons |
| 500 sq ft | 3.3 gallons | 4 gallons |
These figures cover the deck floor only. Railings, balusters, stairs, and skirting add to the total surface area and should be calculated separately. If you’re unsure, text your project dimensions or pictures to (636) 288-8512 and we’ll tell you how much to order.
After 30 years of field work, these are the shortcuts and errors we see most often:
Our Restoration Kits bundle everything you need for your specific project size, and every order ships free.
Not sure which products you need, how much to order, or what condition your deck is in? Call or text the Project Support Hotline at (636) 288-8512. You’ll talk directly to a wood restoration professional with decades of hands-on experience. No phone trees, no call center. Send us a photo of your deck and we’ll give you a personalized recommendation.
You can also start with a Sample Color Kit ($15, credited toward your full order) to test every Timber Oil color on your actual wood before committing.