

A wooden deck is not just an aesthetic feature of your home; it’s a symbol of lifestyle, a platform for outdoor relaxation, and an arena for memorable gatherings. Yet, as pivotal as a deck is to our outdoor enjoyment, its maintenance often gets overshadowed by the allure of the immediate visual transformation staining provides. This oversight can lead to premature wear and tear, diminishing your deck’s beauty and lifespan.
The secret to a lasting and visually stunning deck is the meticulous preparation process before applying a single drop of stain. Leveraging Woodrich Brand’s wealth of knowledge and high-quality wood restoration products, this guide aims to demystify and streamline the deck preparation process. Whether you’re a homeowner looking to revitalize your outdoor space or a DIY enthusiast aiming for professional-level results, the insights provided here will ensure your deck staining project starts on solid ground.
Founded by Russell Cissell, Woodrich Brand has been at the forefront of wood care innovation since the turn of the century. Drawing from years of hands-on experience in the power washing industry and a passion for developing groundbreaking wood care solutions, Woodrich Brand has established itself as a go-to source for contractors, homeowners, and DIY enthusiasts alike. The brand’s lineup, which includes products like the EFC-38 Environmentally Friendly Cleaner & Mild Stripper and the Citralic Wood Brightener/Neutralizer, encapsulates the essence of expert wood restoration and preservation.
In this guide, you will learn:
• The Critical First Step: Inspection and repair strategies to tackle before you even think about staining.
• Deep Cleaning Done Right: How to use Woodrich Brand products effectively to clean your deck, setting the stage for stunning results.
• Balancing Act: PH balancing with Woodrich Brand’s Citralic Wood Brightener/Neutralizer is important to ensure your stain adheres correctly and lasts.
Preparing your deck for staining is about more than just aesthetics; it’s about extending the life and enhancing the beauty of your wood decking. Follow along as we guide you step by step through the preparation process, drawing on Woodrich Brand’s extensive expertise and product excellence to help you achieve the best possible outcome for your staining project.
Let’s embark on this journey to transform your deck into an outdoor space, a masterpiece of wood care and craftsmanship.
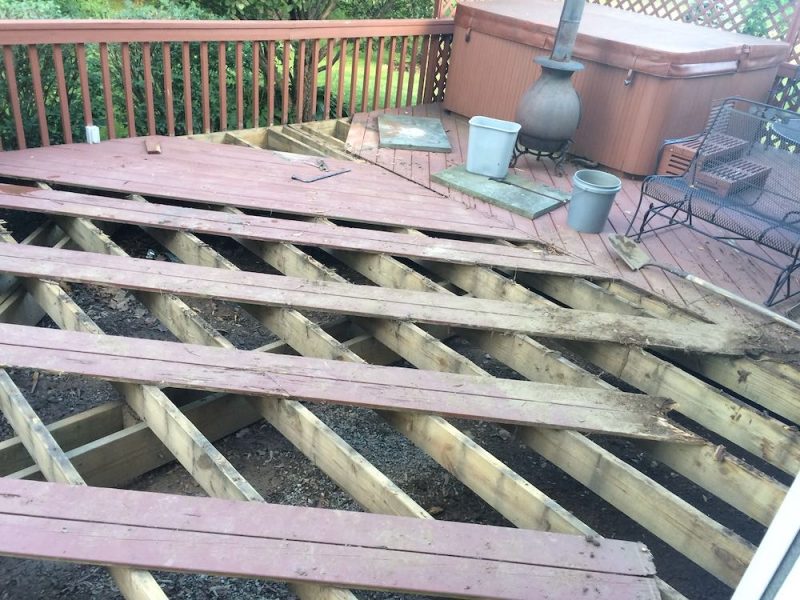
The excitement is palpable when envisioning a beautifully stained deck that complements your outdoor living space.
However, the secret to achieving that picture-perfect finish isn’t just in the staining technique or the quality of the stain itself; it begins much earlier, with the meticulous preparation of the deck.
The first and arguably most crucial step in this preparation process is the inspection and repair of your deck.
Before you dream about the vibrant or sophisticated stain on your deck, it’s imperative to inspect every inch of it. This step is often overlooked in the rush to see the end result, but it’s vital. Without a thorough inspection, minor issues could escalate and undermine your staining efforts and the deck’s structural integrity.
Imagine staining over a hidden problem, only to find that you must replace the entire section later. It’s not just about aesthetics; it’s about ensuring durability and safety.
During the inspection, what exactly should you be on the lookout for? Here are the usual suspects:
Once you’ve identified the issues, the next step is to address them diligently. Each problem has its unique solution, but here are some general guidelines:
It’s worth noting that proper inspection and repairs not only pave the way for a successful staining project but also extend the life and beauty of your deck. Ignoring these steps can lead to further decay, unsightly marks post-staining, and, in the worst-case scenario, structural failures.
In conclusion, prepping your deck for staining is more than just a cleaning job; it’s a restoration project that requires attention to detail from the ground up. The foundation of a stunning, durable finish is a well-inspected and meticulously repaired deck. Stay tuned for the next part of this series, where we’ll dive into the best methods to clean your deck before staining, including choosing the right cleaner and application tips for optimal results.
Remember, a little effort in the preparation stage goes a long way in achieving that dream finish on your deck. So, grab your inspection tools, roll up your sleeves, and begin the journey towards reviving your deck’s splendor.
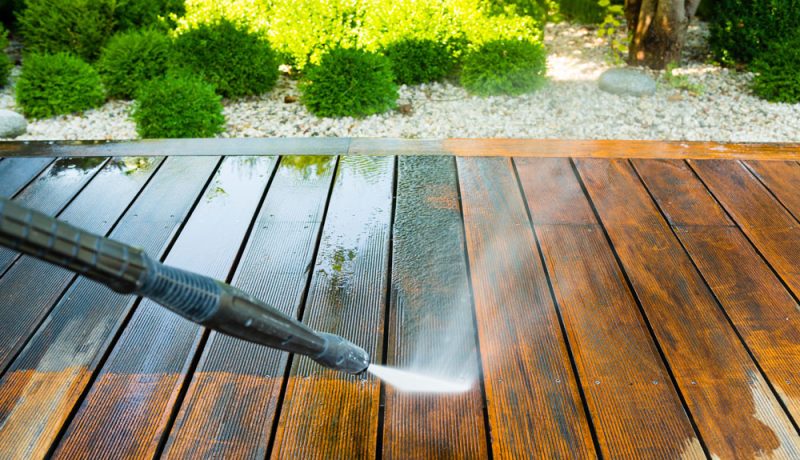
After carefully inspecting your deck and making the necessary repairs, the next step in prepping your deck for a stunning stain job is thorough cleaning. This part is not merely about removing dirt and debris; it’s a critical process that ensures the stain adheres correctly and evenly, highlighting the natural beauty of your wood deck. Choosing the right cleaner and applying it properly can make all the difference in the results of your staining project.
The market is flooded with various deck cleaning solutions, each promising to deliver the pristine surface needed for staining. However, not all cleaners are created equal. To protect the integrity of your wood and ensure a successful stain application, it’s crucial to select a non-bleach-based cleaner. While bleach cleaners might seem effective at removing stains and discolorations, they can damage the wood fibers, leading to a dull and lifeless appearance.
Instead, the focus should be on a more wood-friendly alternative—percarbonate-based cleaners. These oxygenated cleaners work by releasing oxygen bubbles into the wood fibers, effectively lifting and removing dirt, grime, and organic growths such as mold and mildew without the destructive effects of bleach. This cleaning method is not only safer for your deck but also for the surrounding plants and landscaping due to its environmentally friendly properties.
One might wonder why percarbonate-based cleaners are highly recommended for this task. The answer lies in their composition and how they interact with wood surfaces. Unlike harsh chemical cleaners, percarbonate cleaners rejuvenate the wood, preparing it for staining by opening up the pores without causing harm. The Forrest Products Laboratory underscores the effectiveness of these cleaners, suggesting their use for the best results in deck prepping.
A prime example of a percarbonate cleaner is EFC-38. Known for its exceptional cleaning properties, EFC-38 is designed to tackle heavy grime, mildewed areas, and weathered wood, restoring the deck to a near-original state. It’s a testament to the cleaning power required to ensure your deck is in the optimal condition for staining.
To harness the full potential of percarbonate-based cleaners like EFC-38, it’s essential to follow specific application guidelines:
By following these steps and utilizing a percarbonate-based cleaner like EFC-38, you are setting the stage for a stunning staining job. Cleaning not only enhances the look of your deck but also ensures the stain adheres properly, extending the life and beauty of your outdoor living space.
Next, we’ll explore how to balance your deck’s pH levels with a neutralizer to prepare it for the perfect stain application. Stay tuned for the final part of this series where we will dive into the importance of pH balancing and how to achieve it for an impeccable finish.

Congratulations on making it to the final and perhaps one of the most pivotal steps in prepping your deck for staining: pH balancing. After thoroughly cleaning with a percarbonate-based cleaner, your deck is almost ready for that finishing touch. However, before you dip your brush into the stain, an essential process must not be overlooked—neutralizing the deck’s pH levels. This step is crucial for ensuring optimal stain adhesion and longevity.
Let’s dive into a bit of science to understand why pH balancing is necessary. Wood, by nature, has a certain level of acidity or alkalinity, measured on the pH scale. Cleaning products, especially those used for stripping old stain or mold removal, can alter this balance, pushing the wood’s pH towards the alkaline side.
Stains, particularly those that are water-based, require a specific pH range to bond effectively with the wood fibers. If the wood is too alkaline, the stain might not adhere as expected, leading to premature wear and an uneven finish. Therefore, after cleaning, adjusting the wood’s pH to a neutral level (around 7 on the pH scale) is essential for creating the perfect canvas for staining.
Not all pH neutralizers are created equal, and selecting the right one can significantly affect the outcome of your staining project. Your best choice is a quality wood brightener that doubles as a pH neutralizer. These products are specifically formulated to restore the wood’s natural pH balance while enhancing its natural beauty—giving it a brighter, more vibrant look.
When choosing a neutralizer, look for eco-friendly and safe options for surrounding plant life, just as you did with the cleaner. These types of neutralizers ensure that you’re not only taking care of your deck but also the environment. Woodrich Brand’s Citralic Brightener Neutralizer is an excellent choice for fast, safe results.
The application of a pH neutralizer is similar in many ways to the cleaning process, but with its nuances that are crucial for the best results:
The journey from inspecting and repairing your deck to cleaning and finally balancing its pH levels is not just a series of chores; it’s an art and science that nurtures and respects the natural beauty of wood. By carefully following each step, you ensure that your deck is not only aesthetically pleasing but also structurally sound and protected against the elements.
Remember, preparation is key to any successful staining project. The time and effort you invest in prepping your deck pave the way for a stunning outcome you and your loved ones will enjoy for years. Now, with the deck primed and ready, you can bring it to life with your chosen stain. Here’s to the many moments of joy and relaxation your beautifully stained deck will host!
In this guide, we’ve detailed the vital steps required to prepare your deck for staining. Starting with a thorough inspection and repair, we emphasized the importance of addressing any structural issues and imperfections to ensure a solid foundation.
We then delved into the best way to clean your deck, highlighting the effectiveness of percarbonate-based cleaners like EFC-38 for their ability to lift grime and organic growth without damaging the wood fibers. Finally, we covered the often-overlooked but crucial step of pH balancing with a neutralizer to ensure the wood is in optimal condition for stain application.
This extensive prep ensures your deck is visually ready and structurally primed to receive the stain, guaranteeing a beautiful and long-lasting finish. The meticulous attention to each preparation phase—inspection and repairs, cleaning, and pH balancing—lays the groundwork for a staining job that enhances the beauty and longevity of your outdoor living space.
We’d love to hear about your experiences or any additional tips you might have on prepping your deck for staining. Sharing insights can help others in our community achieve the best possible results for their deck projects. Feel free to leave your comments below or share before and after pictures of your deck transformation. Your journey could inspire and guide others in taking their outdoor spaces from ordinary to exceptional.
Remember, the journey to a beautifully stained deck begins long before the brush hits the wood. It starts with your care and preparation to ensure every plank is ready to showcase its beauty. Whether tackling this project for the first time or being a seasoned DIY enthusiast, the right preparation steps can make all the difference.
May your decks be sturdy, your stains be even, and your outdoor moments be filled with joy. Happy staining!
________________________________________